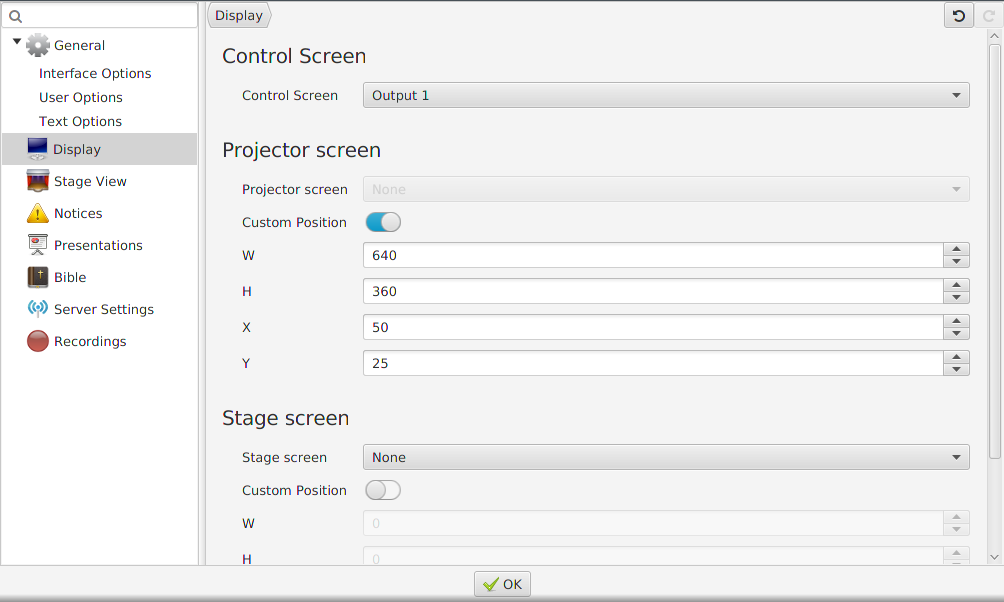
Display tab
We have already covered most of the settings here in previous chapters (Selecting output and Setting up Stage View), so this part will only cover the remaining: Custom Position.
Custom Position
In case your computer is not connected to another screen, but you would still like to preview the output, you could imitate a separate screen by creating a custom position screen. This will create a black box on your control screen as big as you want it and everything you show live will appear there.
You could, potentially, also use it to adjust the size of the output on a separate screen as a last resort if no other settings work (on the monitor/projector or in your operating system), but you would then have to set it up manually.
Custom position settings
The X and Y position allows you to determine where the custom position screen will be located. X: 0 and Y: 0 means that it will be in the top left corner. X will move the screen horizontally and Y vertically. W adjusts the width and H the height. All numbers are in pixels.
One thing to consider could be to preserve the aspect ratio of the screen that you later will use, but this will not be discussed in detail here. For this example, the wide-screen format 16:9 will be used.

As you can see, the screen will be located 50 pixels from the left side of the screen and 25 pixels down from the top of the screen, and be 640 pixels wide and 360 pixels in height. This is of course just an example, so feel free to put in any values if you want to use it.
← General tab Stage View tab →