Stage view
If your computer supports several displays and you have the possibility to have a monitor on stage, the Stage View feature can allow you to display additional information to that screen, apart from what currently is being displayed on the main projection. Currently there are two features available by default for the Stage View: clock and chords. The main idea behind the stage view is that it can be used for worship leaders, hence the chord feature. With that idea in mind, Stage View is meant to be less “cluttered” and therefore presentations, notices and videos will not be visible on the Stage View. To be able to control Quelea from a stage screen and for some additional features, check out the Android application Quelea Stage Mode in the Google Play Store.
Setting up Stage View
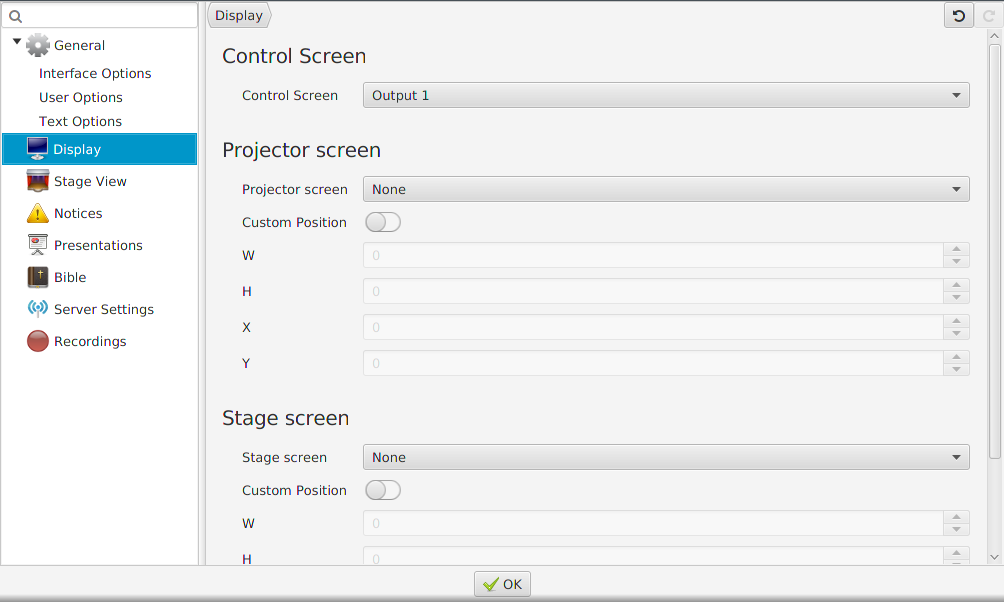
First, enter Options that you find under Tools. Go to the tab Display and activate the Stage screen from “None” to the output you want to use. Preferably, you would have three outputs, one for each screen, but that depends on your graphics card. If you have three outputs, you might need to try them to find which screen you want to use for what.

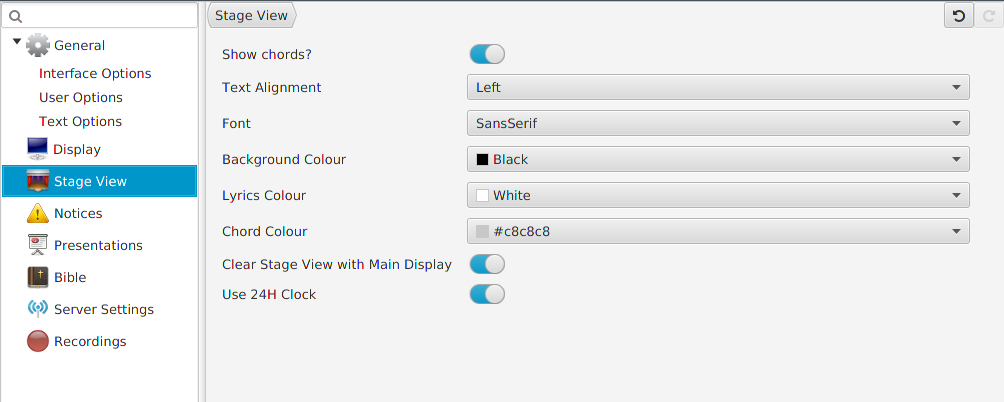
Secondly, go to the tab Stage View. Here you can set up whether or not to use chords, how the text will align, font and colours for background, lyrics and chords. Clock is not an optional feature, although you can change if you want a 24 hour clock or not. You can also select whether or not the Stage View should be cleared when the Main Display is cleared.

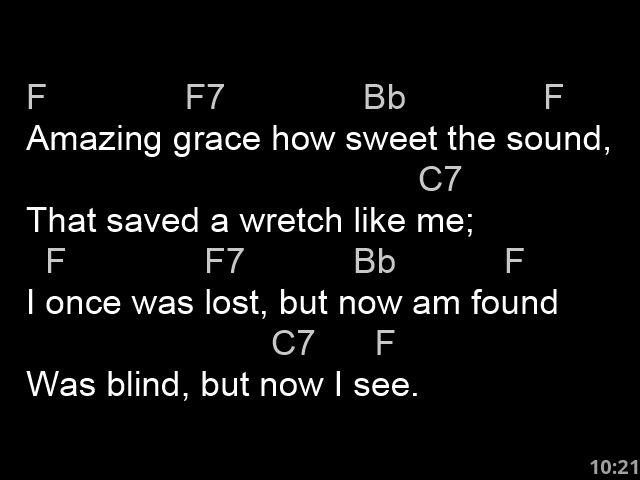
This is an example of what the stage monitor will display if no settings are changed.
